For homeowners, a properly functioning sewer system is crucial to maintaining a clean, safe, and sanitary living environment. Whether you’re building a new home, replacing an outdated system, or connecting to a municipal sewer line for the first time, understanding the basics of sewer system installation is essential.
Sewer system installation is a complex process that involves planning, excavation, permits, pipe placement, and inspections. This guide breaks it all down into manageable parts, empowering homeowners to make informed decisions and ensure long-term system reliability.
Why Sewer Installation Matters
In Albany CA, a professionally installed sewer system—often handled by experts like Winston's Plumbing—ensures proper waste disposal, protects groundwater quality, and prevents costly property damage. Poorly installed systems can lead to backups, foul odors, foundation damage, and even public health hazards.
Beyond home comfort, your sewer system plays a vital role in supporting community infrastructure and environmental health. That’s why many homeowners search for sewer line installation near me to ensure the job meets all local regulations and safety standards.
Step 1: Site Assessment and Planning
The process begins with a thorough site evaluation.
What’s included:
Soil testing to determine absorption rates (if installing a septic system)
Mapping property boundaries and underground utilities
Evaluating slope and drainage conditions
Proper planning avoids future blockages, system overload, and illegal connections. A licensed plumbing contractor or civil engineer typically handles this stage to ensure regulatory compliance and optimal system layout.
Step 2: Getting the Necessary Permits
Sewer installation—whether for a septic system or a municipal hookup—requires permits from local health departments or building authorities. These permits help enforce standards related to public safety, wastewater management, and environmental protection.
You’ll likely need:
Site plans
Engineering drawings
A permit application
Soil percolation test results (for septic systems)
Permit timelines vary, so it’s best to start the application process early. Working with a professional who understands the permitting process in your area ensures a smoother experience.
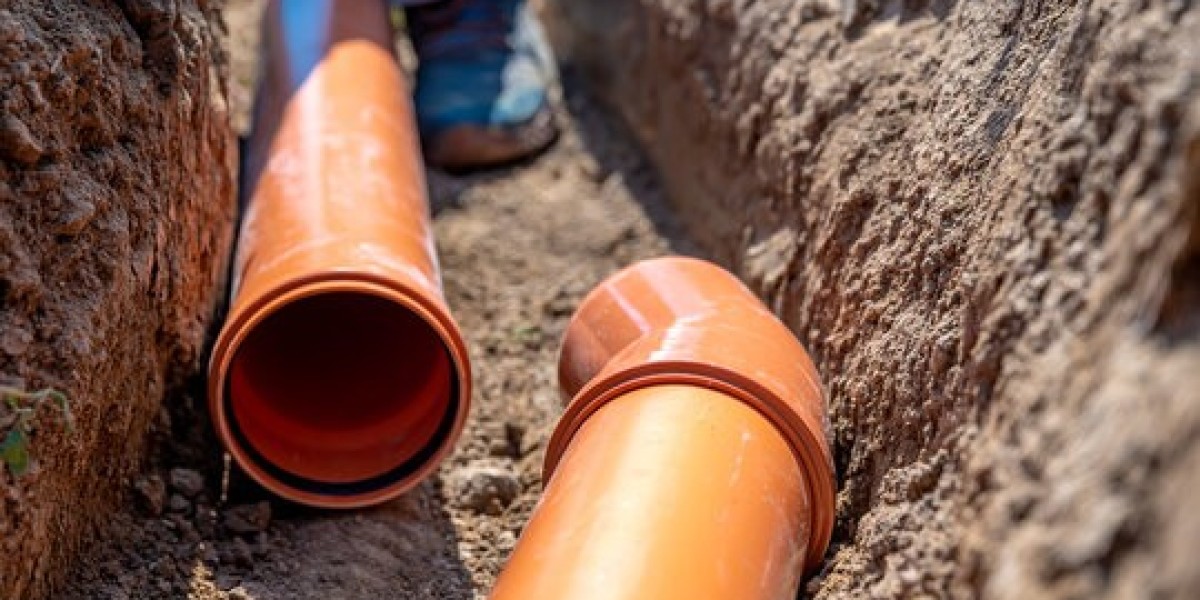
Step 3: Excavation and Trenching
Once plans are approved, excavation begins. Crews will dig trenches from the house to the main sewer line or septic tank location.
Key considerations:
Depth and slope must allow for gravity-fed flow
Trenches must avoid gas, water, and electric lines
Soil and rock conditions can impact project cost and timeline
Proper trenching supports long-term durability and reduces the chance of pipe movement or collapse. Depending on local terrain and property layout, trenchless sewer installation may also be an option.
Step 4: Installing the Pipes and Connections
Sewer pipes are typically made of durable materials such as PVC or ABS. In areas with high traffic or tree root issues, cast iron or HDPE may be used.
Installation includes:
Laying pipes with a consistent downward slope
Connecting pipes to the home’s main plumbing line
Tying into the city sewer or septic tank
Joints must be sealed tightly to prevent leaks, infiltration, or odor escape. Backflow prevention devices may also be added, especially in flood-prone areas.
Step 5: Backfilling and Inspection
After pipe installation, trenches are partially backfilled and the system is pressure tested or inspected via camera.
Inspectors check for:
Proper slope and connections
Leaks or blockages
Code compliance
Only after passing inspection is the trench fully backfilled and compacted. This prevents future settling and protects pipes from shifting under pressure.
Step 6: System Activation and Final Testing
The final step is activating the sewer system and running a complete functionality test. This includes checking:
Flow rate and drainage efficiency
Fixture and appliance connections
Ventilation and gas release systems
For septic systems, the tank and drain field must be correctly installed and balanced. In municipal connections, the flow should be seamless and free of backup or odor issues.
A residential sewer installation expert can also provide a maintenance schedule and recommendations to keep your system running smoothly for decades.
Conclusion
Installing a sewer system is one of the most important investments you can make in your property. It affects your health, your comfort, and your home’s long-term value. While the process may seem overwhelming, understanding each step—from planning and permits to inspection and activation—helps homeowners take control of their project. Partnering with a certified installer ensures the job is done right the first time, giving you peace of mind and a system built to last.
Frequently Asked Questions
1. How much does sewer system installation cost?
The average cost for a residential sewer line installation ranges from $3,000 to $10,000, depending on depth, length, materials, and whether trenchless methods are used. Costs may rise if obstructions like trees or rock are encountered.
2. What’s the difference between a septic system and a sewer connection?
A septic system treats and disposes of wastewater on your property using a tank and drain field. A sewer connection ties your home to a municipal sewer system, sending waste to a treatment facility.
3. How long does it take to install a sewer system?
Typical installation takes 3 to 7 days, including excavation, piping, inspections, and backfilling. Permit delays, weather, or complex site conditions may extend this timeline.
4. Can tree roots damage sewer lines?
Yes, especially if pipes are older clay or concrete. Roots can infiltrate cracks and joints, causing clogs or even pipe collapse. New PVC or HDPE pipes are more resistant. Annual sewer line inspections help detect issues early.
5. Do I need a permit for sewer line installation?
Absolutely. Local governments require permits to ensure proper installation and code compliance. Failing to get a permit can lead to fines and require the work to be redone. Always consult a licensed contractor for help with the process.